By Lisa Kae Thomas
Preface
Introduction
Video Demonstration by the Author
How to Wash Dishes: Methods
Determine Your Dishwashing Method
Dishwashing personality test!
Manual Dishwashing Methods
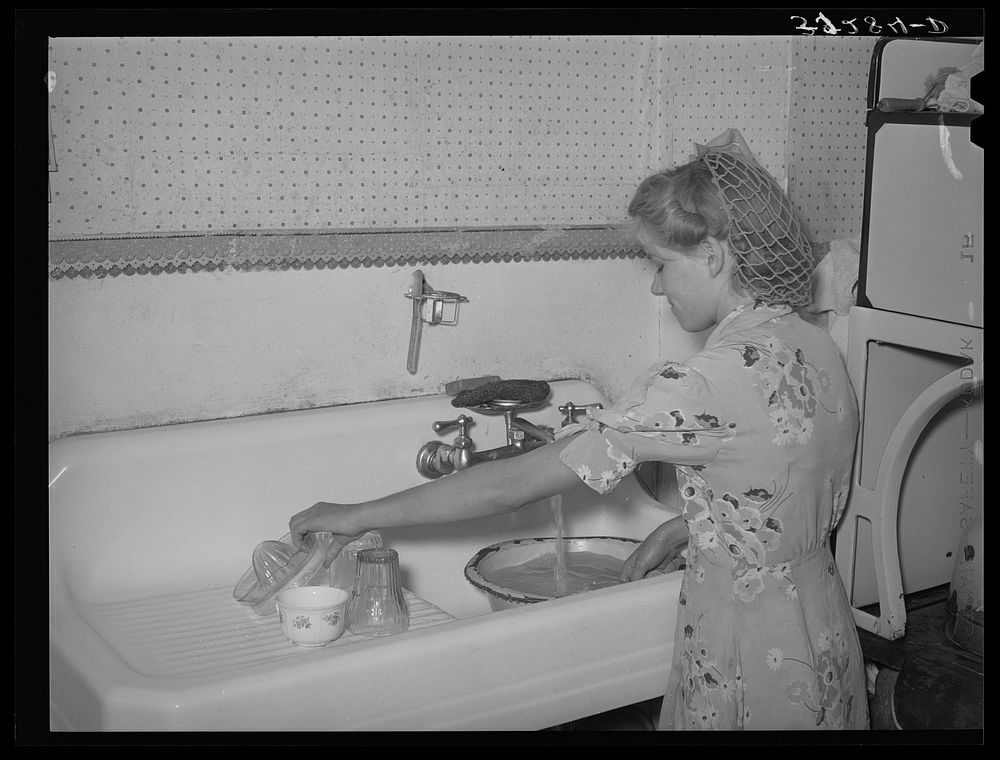
Bath Method
Tools needed:
Phase 1: Preparation
Phase 2: Wash and Rinse
Phase 3: Dry and Put Away
Adaptations for dishwashing as a team of two or three:
Shower Method
Tools needed:
Phase 1: Preparation
Phase 2: Wash and Rinse
Phase 3: Dry and Put Away
Machine Dishwashing Methods
Machine Method
Tools Needed:
Phase 1: Preparation
Phase 2: Wash and Rinse
Phase 3: Dry and Put Away
Hybrid Machine/Manual Method
Why Wash Dishes: Motivation and Meaning
Music
Podcasts
Poems
Visual Arts
Preface
Welcome to the opportunity to transform your dishwashing experience!
This guide is part of a larger course on making housework enjoyable. In the course, I start with the most transformative ideas and most time-saving skills first, and this guide shows up early on. Efficient and effective dishwashing has transformed my entire kitchen experience and saved me lots of time. I’m excited to share.
In this guide, I’ve got how-to material, motivational material, and meditational material, all aimed at taking dishwashing from a dreaded drudgery to delightful diversion--or at least a more readily doable job. I actually enjoy doing the dishes and I think you can too.
In writing this, I find myself wondering why I care so much. Most people hate washing dishes and avoid thinking about it. So why do I feel so strongly about something as basic as doing the dishes that I would research dishwashing and write an entire guide on the subject?
One reason is that of all household jobs, doing the dishes is one that almost everyone must do almost every day. Something that pervasive deserves some attention. Dirty dishes are a never ending fact of life; cleaning them takes up a significant portion of our time when added up over the course of a lifetime. That time can be awful or awesome. The choice is ours. This purpose of this guide is to help us choose a lifetime of good dishwashing experiences.
This guide has not been fully edited yet. Please excuse any errors present, or better yet, let me know about them so I can fix them!
Introduction
In writing this guide, I drew on my own and my friends and family’s experiences washing dishes in a commercial kitchens and at home, academic research articles, the book Dishwasher: One Man’s Quest to Wash Dishes in All Fifty States, and the FDA’s warewashing guidelines. I studied various video recordings on different ways of washing dishes and even made my own youtube video.
Video Demonstration by the Author
(I’m still not done with the voiceover on it, but here it is so far).
How to Wash Dishes: Methods
Dishwashing methods vary a lot. In fact, one study of 113 people from seven different European countries found that “almost all persons had something like their ‘own way’ of washing up.” However, not all methods are efficient or effective. While there are a few areas of housework that I think you can do almost any way you want, when it comes to dishwashing, there are a few truly superior methods if you want to maximize efficiency and cleanliness, which in turn protect your time, the environment, and your health.
The methods described below are more effective than most because they apply time- and water-saving efficiency principles. These methods encourage focus on one aspect of dishwashing at a time, minimizing the amount of water and soap needed and reducing the time and effort wasted on frequent switching between tasks.
These methods are also especially effective because they optimally apply the laws of cleaning as described in 1959 by Dr. Herbert Sinner, a detergent chemist, in what is now commonly called “Sinner’s Circle.” Dr Sinner showed that cleaning happens as a result of the interaction between four factors: time, mechanical action, chemical action, and temperature, and that lack of any factor could be compensated for by increasing other factors. For example, if we want to spend a minimum of time washing dishes, we can increase our water temperature, our soap quantity (to an extent), and the vigor of our rubbing and scrubbing, and the cleaning will happen in much less time. Likewise, if we don’t want to put a lot of energy into rubbing and scrubbing, we can increase the water temperature, add a bit more soap, and increase the amount of time the hot water and soap are in contact with the dirt (also known as soaking), making it easy to remove the dirt without a lot of effort. You’ll notice that the methods described here incorporate strategies to help reduce both the time and the effort involved in washing dishes according to Dr. Sinner’s laws of cleaning, making these methods quicker, easier, and more effective at cleaning than most other methods.
While each of the four methods described is adapted to the different dishwashing scenarios we typically find ourselves in, underlying every method is this universal best practice: don’t wait to do the dishes. Waiting grows bad bacteria, bad smells, bad feelings, and “super cruds” like dried-on food that won’t part with the dishes without a fight. Do yourself and the world a favor: do the dishes now.
Determine Your Dishwashing Method
In this guide I’ll present the four fastest and most effective ways to blast through your dishes and achieve cleanliness and sparkle in the process. With practice, you’ll find that by following these methods, you will cut your dishwashing time down significantly--I would guess you’ll cut your time by half or more. Maybe you won’t be that fast the first time you try these methods, but by the third or fourth time, when you’ve got the system down, you’ll wonder why you’ve spent so much time doing dishes...or avoiding what turns out to be a really quick job.
These methods include two manual dishwashing methods, which I call the bath method and shower method, and two machine dishwashing methods, which I call the machine method and the hybrid method. You’ll be a dishwashing master when you understand and can skillfully apply any of the four methods depending on your dishwashing scenario.
Because I’m going to teach how to do each of these four methods, this lesson is long. Don’t feel like you need to read all of it. If you don’t want to read the whole thing right now, just focus on the dishwashing method that fits your situation in life right now by taking this
Dishwashing personality test!
- Do you have a functional dishwashing machine? (If you do have a machine but prefer manual washing or if you’re only washing dishware that requires manual washing, answer no)
- What quantity/type of dishes are you washing?
- A few (dishware for one or two people)
- More than a few (dishware from a family, a party, a serious cook who used a lot of dishes, or all of the above)
- Any dishware that requires handwashing (not dishwasher safe)
If you answered
- Yes and A: use the machine method or the shower method
- Yes and B: Use either the machine method or a hybrid method
- Yes and C: Use either the bath or shower methods
- No and A: Use the shower method
- No and B: Use the bath method
- No and C: Use the bath or shower methods.
Manual Dishwashing Methods
Bath Method
This is the best method to use if you
- have lots of dirty dishes and
- aren’t using a machine (either because you don’t have one, you’ve already filled it, or your dishes aren’t dishwasher friendly)
Tools needed:
- Dish soap. Dawn, Dr Bronner’s Sal Suds, and 7th Generation brands consistently receive top marks for effectiveness in popular dish soap reviews over the last few years.
- Washing tool. This should be a fresh dish cloth, scrubbing pad, or sponge. Microfiber dish cloths are very effective. Dark green Scotch Brite pads are my favorite scrubbing pad because you can keep them pretty clean and they’re great for scouring when you need to. Sponges also work. (Don’t get me started on the dishcloth vs. sponge debate. As long as they haven’t been breeding in the sink for a few days, they both work.)
- Dish brush. I have several, including a bottle brush, mini bottle brushes, and a brush on a handle. The brush gets into holes and cracks and details that are inaccessible otherwise.
- Optional but highly recommended: rubber gloves. The most flexible and durable ones I’ve found so far are made by casabella. They last me several months of heavy use. Your grocery store will have inexpensive yellow ones, but they may only last a week. I’ve tried using haz mat gloves from Home Depot, and they work but make me a bit clumsy since they’re so thick. They’ll last forever though.
- Optional: apron. You’re going to splash.
- Optional: dish basin. Dish basins protect your dishes and your sink from damaging each other if you have a stone or porcelain sink. Basins are also helpful if you have a single-well sink and need to divide the sink. A big bowl or pot will suffice if you don’t have a basin.
- Optional but highly recommended: interesting audio. Music, conversation, books, whatever.
- Optional: timer to see how fast you can go.
Depending on the configuration of your kitchen, dishes will go from dirty on the left to clean on the right. I assume a two-basin sink. If you have a one-basin sink, divide it by putting a dish pan or large pot or bowl on the left side of the sink.
Tip: If you can, get a friend to read the following instructions out loud to you while you’re doing the dishes. Try to do what the instructions say while your helpful friend is reading them to you. You’ll be done with your dishes quicker than you’d think! If you don’t have a friend willing/available to help you with this, you can listen along to my yammering on my youtube video that demonstrates this method of dishwashing.
Phase 1: Preparation
- Turn on your tunes! Your goal is to complete this task in the time it takes to listen to about three or four typical 3- to 5-minute tracks. Put on an apron and rubber gloves. Take deep breaths, and stretch your arms and legs. You’re now ready to move mountains, literal dish mountains, with speed, focus, faith, and valor. You’ll likely be done in less than 20 minutes. With that thought in mind, on your marks, get set, GO!
- Gather all dirty dishes. Cary a basin to collect them in, just like the do in restaurants to keep from running back and forth if you’ve got a lot of dirty dishes sitting around. Don’t forget to check rooms outside the kitchen. (1 min)
- Scrape or dump crud from the dishes into trash, quick rinse anything really saucy, and stack all scraped and rinsed dishes on the left of the sink. Stack on the floor if you must. I do that all the time! Scrape and pre-rinse any dishes in the sink as well. Both sides of the sink should now be empty and your dishes should all be ready on the left. (1 min)
- Rinse the sinks out and stop up the left side of the sink or use a basin. Fill the left sink with SCREAMING hot water about half way full and add a generous squirt of dish soap. The hotter the water, the faster you’ll get the dishes done and the more bacteria you’ll kill. Wear rubber gloves so you can take the heat.
- While one side of the sink is filling up, clear and wipe out the other side of the sink with soapy water to get it ready for clean dishes to be set into it. Squirt some soap and water right onto those extra greasy pans stacked to your left.
- Find a clean dish cloth, a clean scrubbing pad, and a scrub brush. Lay a clean towel on the counter to the right of the sink, or have an empty drying rack ready.
- Assume the dishwashing squat by spreading your legs and bending your knees into a squat until your arms are at a comfortable height and you are not bending over your sink. This is how professional kitchen workers do it (seriously!), and you’ll be feeling the burn. This is great incentive to speed through that dish pile! If you’re less tall, like me, you may not need to incorporate this step.
Phase 2: Wash and Rinse
- At this point, if you have any sharp objects, either set them aside to do later or put them all in now as your first batch. Doing blades by themselves keeps your fingers intact. Start putting dishes right into the hot soapy water in the left sink, starting with utensils. The rule is to wash dishes in order from what’s closest to farthest from your mouth when you use it. This means you do cutlery first (that stuff went in mouths), then cups (also touched mouth), then bowls and plates, then preparation and serving dishes, with pots and pans last. This is also typically the order of least dirty to most dirty, which maximizes your dish water’s potency through the whole batch of dishes. If you have any sharp objects, either set them aside to do later or put them all in now as your first batch.
- Load up the left sink with first things first (cutlery, cups, maybe some plates and bowls) until the soapy water is quite full before you even begin washing. Just leave yourself enough room in that sink to wipe things. Loading up the sink gives your dishes maximum time submerged in the hot, soapy water, allowing the hot water and soap to do the majority of the work for you. Note: some types dishes should not be submerged in water. Save these weirdos for last.
- Start wiping and scrubbing. If your water is good and hot with plenty of soap, you really won’t have to work too hard on this step because the water and soap will have done a lot of the work for you, even in just a few seconds of being in that water (if it’s truly screamin’ hot). Focus on wiping the areas of the dish that hands or mouths touched. If hands or mouths didn’t touch it, like the bottoms of plates, bowls, cups, and pots, you may not even need to wipe those places unless there’s something obviously greasy or stuck around there. Depending on how you loaded the sink, you’ll have bigger items on top and cutlery on the bottom.
- Once the dish has been wiped or scrubbed, put it in the right side of the sink and just leave it there. Go back to scrubbing and wiping and keep filling the right side of the sink until it’s almost full of soapy dishes.
- With the right side of the sink full of soapy dishes, switch for a moment from washing to rinsing. Turn on the tap or sprayer with screaming hot water, and get the soap off the top dish, allowing the water to wash over the whole pile as you work your way to the bottom of the pile, stacking each rinsed dish on the towel or in the drying rack. You may need to add another towel on the counter or kitchen table if you’re doing a lot of dishes. Just let the clean wet dishes drip and air dry while you go back to wiping and scrubbing.
Note: This method of washing and rinsing maximizes time and water use. You’ll notice that washing a pile in one sink of water and then rinsing a pile at a time is much, much quicker and water wise than washing one dish, then rinsing it, then washing another, than rinsing that one…
Tip: Rinse your cutlery by the fistful. It works, and it’s a lot faster than one spoon at a time.
Phase 3: Dry and Put Away
- In professional kitchens, dishes are always air dried; they’re never toweled off, because air drying is actually more sanitary. Air drying is also less work for you. If you’re doing your evening dishes, leave the clean wet stack overnight and put it away first thing in the morning. But if you need the counter space, go ahead and towel dry everything off with a clean, lint-free towel (like a flour sack towel) after you’re done with all the washing and rinsing. Waiting until you’re done washing and rinsing will allow dishes the most time to drip and air dry, making less work for you, even if you are toweling off.
- When the dishes are dry, put them all away. You did it! You’re a hero!
Adaptations for dishwashing as a team of two or three:
Person A gathers and preps dishes for washing while person B preps sinks; Person A rinses and stacks dishes while person B washes (this is particularly fun when you race to see if the washer can get ahead of the rinser/stacker). If there’s a person C, that person can dry and put away.
Shower Method
This method is best if you
- have a very few dirty dishes (fewer than ten) and
- you aren’t using a machine either because you don’t have one, you’ve already filled it, or your dishes aren’t dishwasher friendly.
Tools needed:
- Dish soap. Dawn, Dr Bronner’s Sal Suds, and 7th Generation brands consistently receive top marks for effectiveness in popular dish soap reviews over the last few years.
- Washing tool. This should fresh dish cloth, scrubbing pad, or sponge. Microfiber dish cloths are very effective. Dark green Scotch Brite pads are my favorite scrubbing pad because you can keep them pretty clean and they’re great for scouring when you need to. Sponges also work. (Don’t get me started on the dishcloth vs. sponge debate. As long as they haven’t been breeding in the sink for a few days, they both work.) A soap-dispensing brush may be acceptable with this method, but avoid soap-dispensing sponges. There really is no way to keep that sponge sanitary.
- Drying rack or towel to set clean, wet dishes on.
- Optional but highly recommended: rubber gloves. The most flexible and durable ones I’ve found so far are made by casabella. They last me several months of heavy use. Your grocery store will have inexpensive yellow ones, but they may only last a week. I’ve tried using haz-mat gloves from Home Depot, and they work but make me a bit clumsy since they’re so thick. They’ll last longer than you want them to though.
- Optional: apron. You’re going to splash.
- Optional: interesting audio. I’d only take the time to que up some interesting audio if I’m going to be cleaning the rest of the kitchen. Otherwise, this is going to be such a short job it’s not worth the time. Just sing to yourself. You’ll probably be done by the time you’ve finished one to three rounds of “Happy Birthday.”
- Optional: timer to see how fast you can go.
Phase 1: Preparation
- Gather all dirty dishes. If you’ve got more than you can collect in your hands, grab a basin to collect them in, just like the do in restaurants to keep from running back and forth. Don’t forget to check rooms outside the kitchen. (1 min)
- Scrape or dump crud from the dishes into the trash, using a dish brush to help. Quick rinse anything really saucy, and stack all scraped and rinsed dishes into the sink, it doesn’t matter which side. You should have a small pile of basically rinsed dishes stacked in the sink at the end of this step. (1 min)
- Find your washing tool (a washcloth or sponge are most effective). Set up your drying station on one side of the sink. This could be a drying rack or a towel spread on the counter top.
Phase 2: Wash and Rinse
- Turn on the SCREAMING hot water so it’s running in a slow but steady stream over your dish stack. The hotter the water, the faster you’ll get the dishes done and the more bacteria you’ll kill. Wear rubber gloves so you can take the heat.
- Grab your washing tool of choice and squirt some soap into it. Grab the top dish and start rubbing it with the soapy washing tool.
- Rinse the soapy dish until there are no more suds on it and set the clean, wet dish on the drying rack or towel.
- Repeat until the dishes are all on the drying rack/towel.
Phase 3: Dry and Put Away
- In professional kitchens, dishes are always air dried; they’re never toweled off, because air drying is actually more sanitary. Air drying is also less work for you. If you’re doing your evening dishes, leave the clean wet stack overnight and put it away first thing in the morning. But if you need the counter space, go ahead and towel dry everything off with a clean, lint-free towel (like a flour sack towel) after you’re done with all the washing and rinsing. Waiting until you’re done washing and rinsing will allow dishes the most time to drip and air dry, making less work for you, even if you are toweling off.
- When the dishes are dry, put them all away. Go you! You’ve just made the world a better place.
Here’s a video of someone using this method (he calls it the pyramid method). Because of the quantity of dishes he’s washing, he would conserve even more water if he used the bath method. However, his description and demonstration is good and this method is very worthwhile when washing just a few dishes.
Machine Dishwashing Methods
Studies have shown that machine dishwashing is in general the way to go for the cleanest dishes and the best resource conservation. When compared with manual dishwashing, dishwashing machines can use less and much hotter water and much more powerful detergents to practically sterilize the dishes. However, you can be very resource-efficient with proper handwashing techniques. If you have a machine, follow homemaking expert Daryl Hoole’s advice and “never do what a machine can do for you.”
It’s worthwhile to understand how your dishwashing machine works. Find the owner’s manual for your particular machine and read it. What you learn may surprise you and change how you’ve been using/maintaining the machine, extending your machine’s life and producing cleaner dishes. If you’ve never done so, take time to skim your dishwashing machine’s user’s manual now. Even just opening up your machine when it’s empty and having a good look at how the water is distributed is helpful.
Pro dishwashers like Pete Jordan, author of the book Dishwasher, take meticulous care of their machines, even kissing them goodnight after polishing them up at the end of the day (no joke). You don’t need to kiss your machine, but you do need to service it every once in a while. Your machine’s manual should have ideas on how to do that.
Dishwashing machines are loaded simply by placing dishes in the racks so that the water and detergent being dispensed can access the dishes. This means that it’s better to face dishes toward the center if that’s where the water is coming from. Nowadays, most machines are pretty good at getting water just about everywhere though, so “facing center” is less of a concern than it used to be, but know your machine.
Watch out for nesting dishes that prevent water accessing all parts of the dishware (spoons like to spoon in their wash basket), and avoid loading dishes so that they they catch water and crud in them during the wash cycle.
It’s also worthwhile to take stock of what dishware is dishwasher friendly and what’s not. In general, wood, melamine, very sharp knives, thin plastics, very fine china or glassware, and precious metals don’t do well in a dishwashing machine. You may consider eliminating these types of items from your household (with the exception of the universally necessary sharp knives for cooking) if you want to really streamline your dishwashing experience and bring handwashing to a minimum.
Machine Method
This method is best if you
- have enough dirty dishes to fill the machine and
- your dishes are dishwasher friendly.
Tools Needed:
- Dishwashing detergent. This is very different from hand washing soap. Don’t put handwashing soap in your dishwashing machine or you’ll spend the next hour or more mopping up the river of suds that erupts from your machine.
- Dish brush. You’ll use this to prep the dishes for the machine.
- Optional: rubber gloves (see the manual methods section above for discussion on which gloves are the best)
- Optional: apron
- Optional: timer to see how fast you can go.
Phase 1: Preparation
- Gather all dirty dishes. If you’ve got more than you can collect in your hands, grab a basin to collect them in, just like they do in restaurants to keep from running back and forth. Don’t forget to check rooms outside the kitchen. (1 min)
- Scrape or dump crud from the dishes into the trash, using a dish brush to help. Dump leftover liquids from dishes into the sink. I recommend doing this step even if you’ve got a dishwasher with a garbage disposal in it. Dishes with super cruds like dried-on food, melted cheese, peanut butter, or other heavy-duty garbage on them should be placed in the sink after scraping. Otherwise, most dishes can go directly into the dishwashing machine at this point.
Note: You don’t usually need to pre-rinse dishes, or at least not very thoroughly. In fact, some dishwasher detergents are so strong they can actually erode your dishes if there’s not enough stuff on them to wash off. So do yourself and your dishes a favor: don’t over-do your pre-rinse. That said, some dishwashers work more effectively than others. If your dishes are consistently coming out crusty after a wash cycle, you’ll need to pre-rinse more thoroughly.
- Once you’ve loaded the easy stuff, grab your dish brush and turn on some SCREAMING hot water so it’s running in a slow but steady stream over your super-crud-afflicted dish stack. Really hot water will melt and loosen crud quickly. Wear rubber gloves so you can stand the heat.
- Address the super cruds with your dish brush and the hot water. Once the crud is no longer adhering to the dish, put it in the dishwashing machine. You may decide these super cruds aren’t worth wrestling with and need a soak instead. If that’s the case, set them aside in a sink of HOT soapy water to soak until your next dishwashing machine batch or your next manual dishwashing session.
NOTE: In my experience, peanut butter and melted cheese must be completely removed before they get put in the dishwashing machine. Most machines just can’t handle these super cruds.
Phase 2: Wash and Rinse
- Once the machine is full (don’t overfill--it’s not worth it), put in the right amount of detergent. Some detergents include finishing solution, while some dishwashers have a special finishing solution dispenser in them. Again, know your machine to get best results.
- Set the machine to the right settings and start.
Phase 3: Dry and Put Away
- In professional kitchens, dishes are always air dried; they’re never toweled off, because air drying is actually more sanitary. Most dishwashing machines have a dry cycle that does most of the work. If you’re in a hurry or if there’s a bit of water left after the dry cycle, go ahead and towel dry the wet off with a clean, lint-free towel (like a flour sack towel).
- When the dishes are dry, put them all away. Thank you. You’ve blessed your home today.
Tip: If you end your day by loading and running the dishwasher, then start the next day by unloading the dishwasher and putting all the dishes away, you can avoid having a stack of dirty dishes in or around your sink. As dishes are used throughout the day, instead of setting them in the sink, just “set” them right in the dishwasher. This sounds too easy, but it actually works really well if you can remember to do it (and get the family on board!). You can always run a batch of dishes mid-day if you get full by then. If you stay on top of the dishwasher, your kitchen can look and feel pretty tidy most of the time.
Hybrid Machine/Manual Method
This method is best if you
- have more dirty dishes than can fit in the machine and/or
- have dishes that aren’t dishwasher friendly
For this method, follow the directions first for the machine method, and then, depending on the quantity of dishes left, follow the bath method or the shower method to finish off your dishes. At the end of the day I typically follow the hybrid method by doing the machine method and the bath method together. I can usually cruise through the dinner dishes in about fifteen minutes using these two methods. If someone over the age of seven is helping me, I can do it in even less time. You can too!
Why Wash Dishes: Motivation and Meaning
This section still needs work, but for now, here’s a multi-media extravaganza of material that celebrates doing the dishes! Each of these sources either helps pump you up to do the dishes, find some deeper meaning in life while doing the dishes, or both. I’m still collecting sources that celebrate doing the dishes, so please let me know if you have any to add!
Music
- Doing Dishes With My Sweetie--This song from the 1920s cracks me up.
- I’ll Do the Dishes Tonight--Here’s a song about what true love really looks like. Interestingly, there’s research that shows how important doing the dishes can be in a romantic relationship:
For women, the shared task that mattered most for their satisfaction with their relationship was dishwashing. As of 2006, women who found themselves doing the lion’s share of dishwashing reported significantly more relationship discord, lower relationship satisfaction, and less sexual satisfaction than women who split the dishes with their partner. Sharing responsibility for dishwashing was the single biggest source of satisfaction for women among all the household tasks, and lack of sharing of this task the single biggest source of discontent. (Source)
Podcasts
- Fly Lady’s Crisis Cleaning--If you need someone to pump you up and talk you through doing the dishes (and getting the rest of the house clean), I love Marla Cilley’s crisis cleaning podcast. There was a time when I listened to this almost every night while cleaning up the kitchen at the end of the day.
Poems
WHEN we on simple rations sup
How easy is the washing up!
But heavy feeding complicates
The task by soiling many plates.
And though I grant that I have prayed
That we might find a serving-maid,
I'd scullion all my days I think,
To see Her smile across the sink!
I wash, she wipes. In water hot
I souse each pan and dish and pot;
While taffy mutters, purrs, and begs,
And rubs himself against my legs.
The man who never in his life
Has washed the dishes with his wife
Or polished up the silver plate-
He still is largely celibate.
One warning: there is certain ware
That must be handled with all care:
The Lord Himself will give you up
If you should drop a willow cup!
--Christopher Morley
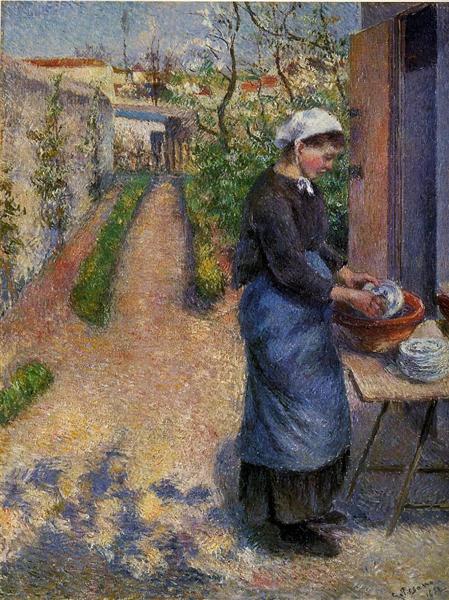
Visual Arts
Pissarro Young Woman Washing Plates
No comments:
Post a Comment